
Outdoor Lighting Planning Guide: Paths, Patios & Entrances
November 09, 2026
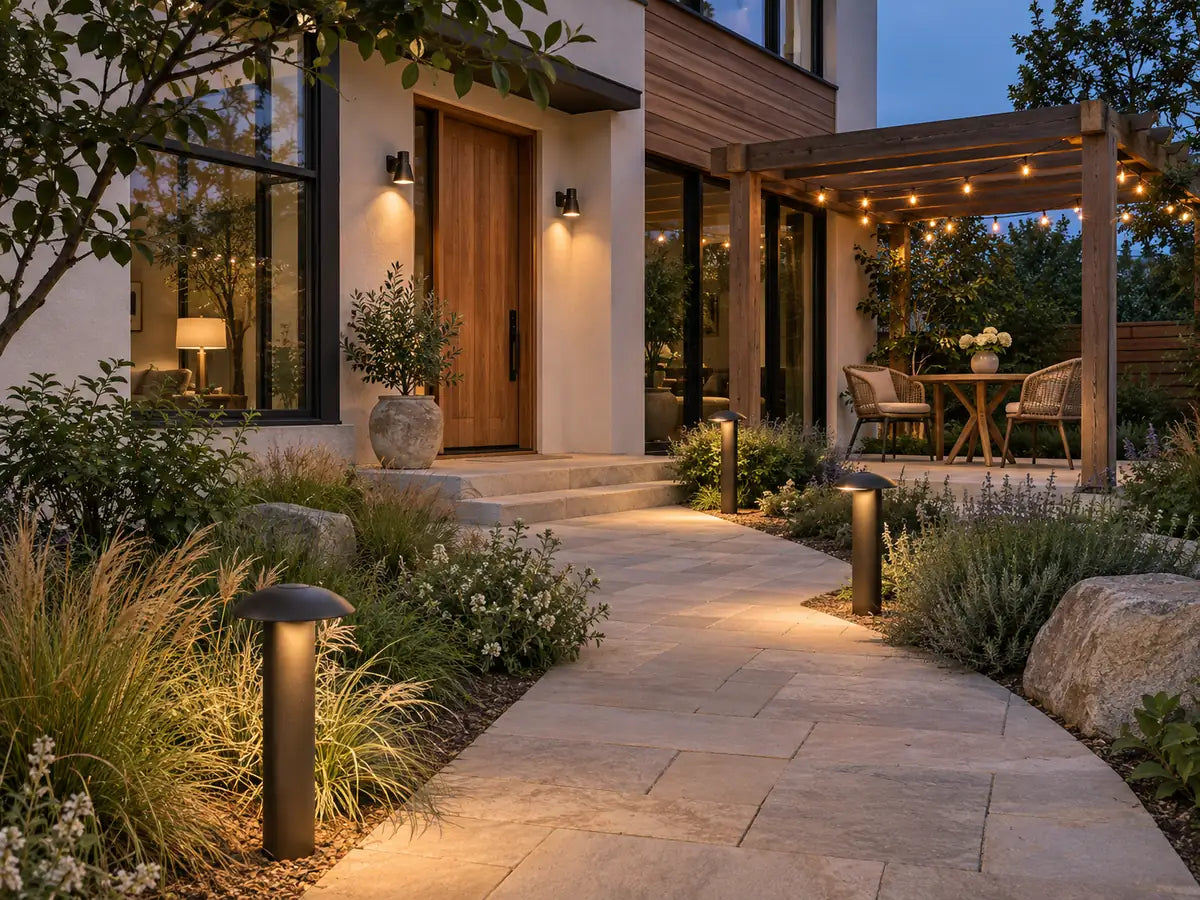
A good outdoor lighting planning guide starts with the places you actually use after dark. Your front door, garden path and patio each need a different approach. Choosing every fixture first and deciding where it belongs later can leave useful areas shadowed and other areas unnecessarily bright.
Begin with movement and everyday activities, then add decoration where it contributes something. The goal is a welcoming exterior with light in the right places, comfortable views and controls that fit your routine.
Use this guide to sketch your layout, compare power options and shortlist fixtures from the Glimvale Outdoor Lights collection.
1. Walk Around Your Property After Dark
Start at the point where you normally arrive home. Follow the route to the door, then walk toward any seating area, side entrance or garden storage you use in the evening.
Record where you pause, search for a key, turn a corner or cross a change in level. Look at the space from inside the house too: a light that seems attractive from the lawn might shine directly toward a bedroom window.
Draw a simple plan showing paths, steps, doors, furniture, planting beds and existing power points. Mark any established fixtures that already perform a useful job. You may need to reposition or supplement your lighting rather than replace everything.
2. Give Each Outdoor Area a Clear Lighting Job
| Outdoor area | Main lighting purpose | What to check first |
|---|---|---|
| Front entrance | Make the door and immediate approach usable | The lock, threshold and view from an arriving visitor's position |
| Garden path | Help define the route | Turns, edges, obstacles and changes in level |
| Steps | Make individual changes in height easier to identify | Whether the tread and edge remain visible from both directions |
| Patio or terrace | Support sitting, dining and movement | Glare from the actual seats and table positions |
| Planting or architectural feature | Draw attention to one chosen detail | Where the beam finishes and whether the highlight is necessary |
| Side access or service area | Provide light for occasional practical use | Control access and whether motion activation suits the route |
Prioritize the entrance and frequently used routes before decorative features. This helps you allocate the budget to the parts of the exterior that affect daily use.
3. Plan Pathway Lighting Around the Route
Path lighting should help someone follow the ground ahead without repeatedly looking into bright sources. Check the illuminated surface, not just how the fixtures look in a daytime photograph.
Begin with corners, junctions and changes in level. Then consider the sections between them. A straight path bordered by low planting has different needs from a winding route beside tall shrubs.
There is no single fixture spacing that suits every garden. Mounting height, beam pattern, output and surrounding surfaces all change the result. Follow the selected product's guidance and test the arrangement after dark before final positioning where practical.
When comparing Landscape Pathway Lights, check the dimensions of the complete fixture and how it directs light. Leave enough room for routine garden maintenance, and consider how planting will grow around it.
For example, a path with two turns and a short set of steps needs those features assessed individually. Dividing its total length by an arbitrary spacing number does not show whether the important details will be illuminated.
4. Choose Entrance Lights From More Than One Viewpoint
At the front door, check the practical details: finding the doorbell, seeing the lock and stepping across the threshold. A decorative glow on the wall does not necessarily illuminate these tasks.
Compare the scale of the fixture with the door, nearby windows and available mounting area. Include the projection from the wall, particularly where people pass close to the fitting.
Explore Outdoor Wall Lights by their light direction as well as their finish. A fixture with a visually striking upward beam may create a different effect from a shielded downward-facing light.
Check the chosen position from the approach, the open doorway and nearby indoor seating. A pair of fixtures can create symmetry, but the arrangement still needs to suit the actual door layout and installation points.
5. Make Patio Lighting Comfortable From the Seats
Plan a patio with the furniture in its usual position. Sit at the dining table and in the lowest lounge chair before deciding where bright sources should go.
For a dining area, consider light on the table alongside the route leading to it. A seating area may benefit from lower, more localized illumination than a work surface used for serving food.
String Lights can help define an outdoor gathering area, but check the actual product's outdoor suitability and mounting instructions. Confirm that its supports, length and power arrangement fit the space; decorative cable should not be treated as structural support unless the manufacturer explicitly designs it that way.
Keep practical work lighting separate where possible. You should be able to use a brighter setting for a task without leaving the entire seating area equally bright throughout the evening.
6. Compare Solar, Low-Voltage and Line-Voltage Options
| Power option | What to assess | What not to assume |
|---|---|---|
| Solar | Panel exposure, battery, selected operating mode and seasonal conditions | That every position will support the advertised runtime |
| Low-voltage wired | Compatible supply, fixture loads, cable layout and connection requirements | That all low-voltage products can share one system |
| Line-voltage hardwired | Available circuits, installation location and suitable mounting | That an existing electrical point suits any replacement fixture |
| Outdoor plug-in | Product instructions, outlet location and cable route | That an indoor extension arrangement is suitable outside |
Choose the power arrangement before finalizing fixture positions. A layout that looks simple on a drawing may become impractical when you consider the available supply, panel exposure or cable route.
For wired systems, have a qualified installer assess compatibility, supply requirements and installation conditions. Low voltage still requires correctly matched equipment and suitable connections.
Where Solar Outdoor Lights Make Sense
Solar can be useful when you want to avoid running a lighting supply to a particular spot. However, the panel needs enough available sunlight to replenish the battery for the intended use.
Check the proposed panel location through the day, including shadows from fences, roofs and trees. Seasonal conditions and the selected brightness or operating mode can affect the energy balance. A test on one clear evening does not establish year-round performance.
When browsing Solar Light Outdoor, compare the actual panel arrangement and charging instructions. Check whether a remote panel is available if the fixture position itself is shaded, and look for battery service information.
7. Match the Fixture to Its Exposure
A sheltered porch and an exposed path are different environments. Before buying, establish whether the fixture will encounter direct rain, wind-driven moisture, irrigation spray or water collecting around its base.
Check the manufacturer's location marking and installation instructions for the exact model. Damp-location suitability is not the same as suitability for direct water exposure. If an IP rating is listed, treat it as one technical specification rather than proof of every aspect of installation suitability.
Also compare operating temperature, material and finish-care information. An outdoor description alone does not tell you how a product will perform in a coastal setting or under your maintenance routine.
Keep pool and underwater applications separate from a general garden plan. Use equipment specifically intended for the application and have its suitability assessed before installation.
8. Control Brightness, Glare and Operating Hours
Begin with a clear purpose for each light, aim it toward the intended area and use only the output needed. Consider shielding and controls so that light does not unnecessarily spill into neighboring spaces or remain on without a reason.
Check the view from the property boundary and nearby windows. A brighter fitting is not automatically more useful if its exposed source makes the surrounding area harder to look at comfortably.
Compare lumen output, light distribution and white-light appearance separately. Where possible, test samples against the actual paving and wall finish: pale stone and dark brick can produce noticeably different visual results.
Timers, daylight sensors and motion controls serve different purposes. Decide whether you want a set schedule, operation linked to darkness or activation when movement is detected. Check the product's available modes rather than assuming it supports all three.
For motion activation, test normal approaches and the detection area. Moving vegetation or activity outside the intended zone may call for a different sensor position or sensitivity setting.
9. Make a Shortlist Before Ordering
| Detail | What to record for each shortlisted fixture |
|---|---|
| Dimensions | Height, width, wall projection and mounting dimensions |
| Lighting | Output, direction, selected light color and available adjustments |
| Power | Supply type and required compatible components |
| Exposure | Location marking, installation conditions and relevant rating information |
| Controls | Timer, sensor, dimming or switching compatibility |
| Maintenance | Cleaning access, bulb or battery replacement and service information |
Confirm these details for the selected variant, not just the main listing photograph. A different size, power option or light-color selection can change the installation you are planning.
After installation, walk the same routes you assessed at the beginning. Review the controls and check the views from your seats and windows. Adjust the arrangement where the product allows, then reassess after planting grows or furniture moves.
Frequently Asked Questions
Where should I start with outdoor lighting?
Start with the entrance and routes you regularly use after dark. Identify turns, thresholds and changes in level before adding decorative lighting.
How far apart should pathway lights be?
Spacing depends on the specific fixture's output, beam pattern, mounting height and the path layout. Use the product guidance and check the illuminated route after dark rather than applying one universal distance.
Are solar lights suitable for a shaded garden?
Assess the sunlight available to the panel and the product's charging requirements. A heavily shaded position may not support the intended operation. A compatible remote panel may help if it can be installed in a better location.
Can an indoor wall light be installed on a covered porch?
Do not assume so. Check the exact fixture's location marking and manufacturer instructions. A roof does not automatically eliminate moisture or wind-driven rain.
Is brighter outdoor lighting always better?
No. The light needs to illuminate the intended area without creating unnecessary glare or spill. Placement, shielding and beam direction matter alongside output.
Should outdoor lights remain on all night?
Choose operating hours to suit the purpose of each light. A timer, daylight control or motion sensor may be useful, depending on the task and the fixture's supported settings.
Create an Exterior That Works After Dark
A useful outdoor plan connects the door, paths and places where you spend time. Prioritize those everyday needs, choose a suitable power arrangement and verify the installation details before buying.
Add decorative highlights selectively, then review the completed space from the places where people actually walk and sit. The result should feel considered and usable without illuminating every part of the garden.
Further reading: DarkSky and IES principles for responsible outdoor lighting and UL Solutions information on outdoor and landscape lighting evaluation.